How to Build a Complete Checkout Flow with Shadcn UI
Build a multi-step checkout flow from cart to order confirmation using Shadcn UI blocks. Covers shopping cart, shipping forms, Stripe payment integration, validation with react-hook-form, and success states for Next.js.
SERP Blocks Team
Product
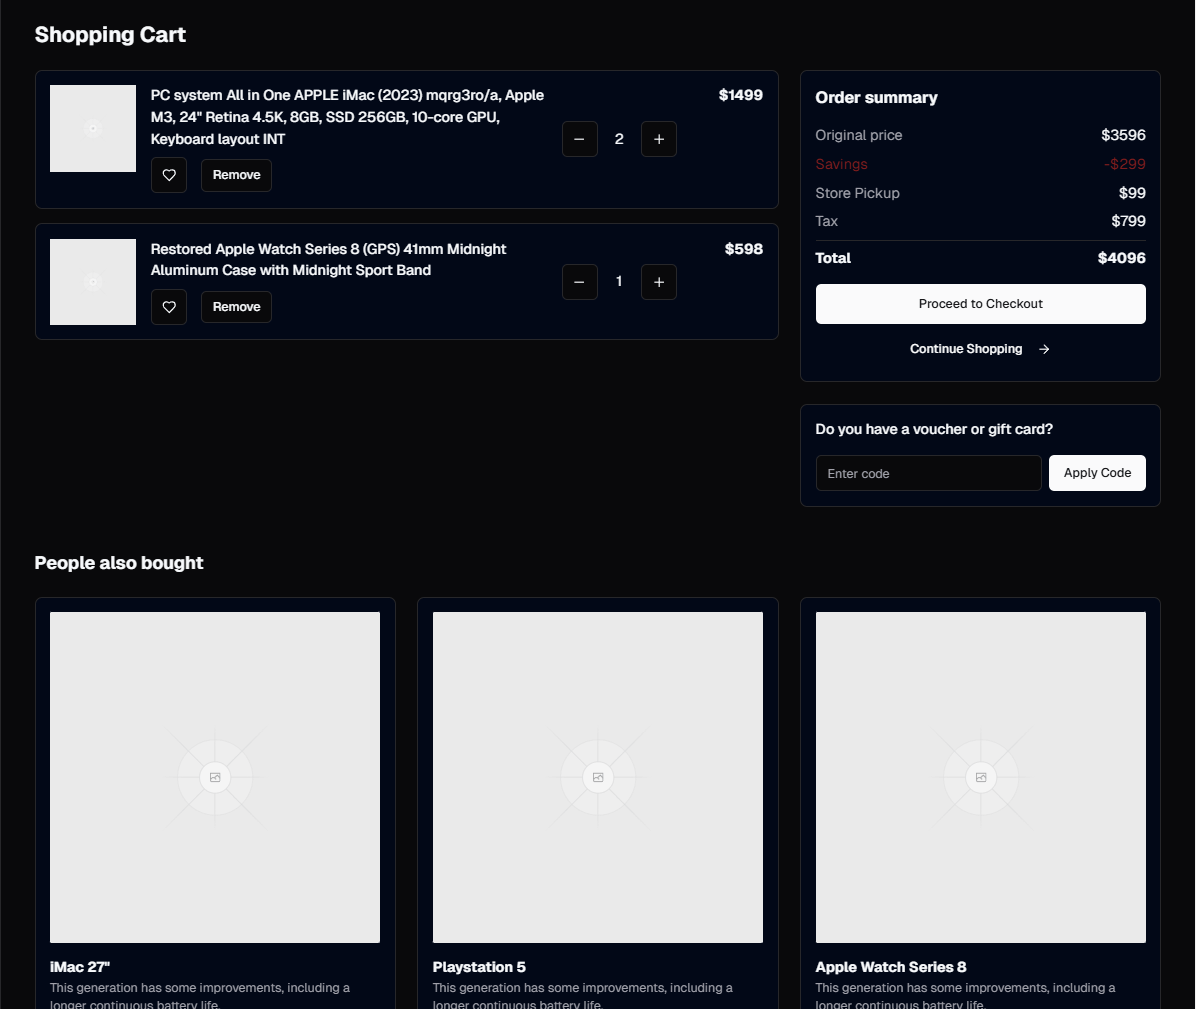
The checkout flow is where your e-commerce revenue lives or dies. A study by the Baymard Institute found that the average cart abandonment rate sits around 70 percent, and a significant chunk of those abandoned carts come down to a clunky checkout experience — too many steps, confusing form layouts, unclear error messages, or a lack of trust signals at the payment stage. Getting checkout right is not optional.
Building a polished multi-step checkout from scratch takes serious time. You need a responsive shopping cart with quantity controls and price calculations. A shipping information form with address validation. A payment form with credit card inputs, billing address handling, and Stripe integration. An order confirmation page that reassures the buyer and sets expectations for delivery. Each step needs progress indicators, form validation, error handling, and smooth transitions between states.
With SERP Blocks, you can assemble all four stages of a checkout flow using pre-built Shadcn UI components designed for exactly this purpose. This guide walks through the entire flow from cart to confirmation, with practical integration patterns for Stripe and react-hook-form.
Checkout Flow Architecture
A standard e-commerce checkout follows four stages:
Shopping Cart — Review items, adjust quantities, see totals
Shipping Information — Collect delivery address and shipping method
Payment — Credit card details, billing address, order review
Order Confirmation — Success state with receipt and next steps
Each stage maps directly to a block category in SERP Blocks. Let's build them in order.
Step 1: Shopping Cart
The shopping cart is where buyers commit to their selections. The shopping cart collection provides 11 blocks covering the major cart layout patterns you need.
Cart Layout Patterns
Different stores need different cart experiences:
Full-page cart — A dedicated page showing all line items in a table layout with product images, titles, variant details, quantity selectors, per-item totals, and an order summary sidebar. This is the standard for stores with high average order values or complex product configurations.
Slide-out cart — A drawer that opens from the right side of the screen, letting shoppers review their cart without leaving the current page. This pattern keeps momentum going — the customer sees their cart, confirms their selections, and clicks "Checkout" without a full page load.
Dropdown mini-cart — A compact dropdown from the navbar cart icon showing item thumbnails, quantities, and a total. Good for quick confirmations after adding items.
Sticky cart summary — A floating widget that stays visible as the user scrolls, showing item count and total with a direct link to checkout.
The full-page cart and slide-out cart are the most common starting points. Full-page carts give you room for upsell sections, coupon code inputs, and detailed shipping estimates. Slide-out carts optimize for speed and reduced friction.
Cart State Management
Your cart needs client-side state that persists across page navigations. The simplest approach for a Next.js app:
// context/CartContext.tsx
"use client";

import { createContext, useContext, useReducer } from "react";

type CartItem = {
  id: string;
  name: string;
  price: number;
  quantity: number;
  image: string;
  variant?: string;
};

type CartState = {
  items: CartItem[];
  total: number;
};

type CartAction =
  | { type: "ADD_ITEM"; payload: CartItem }
  | { type: "REMOVE_ITEM"; payload: string }
  | { type: "UPDATE_QUANTITY"; payload: { id: string; quantity: number } }
  | { type: "CLEAR_CART" };

function cartReducer(state: CartState, action: CartAction): CartState {
  switch (action.type) {
    case "ADD_ITEM": {
      const existing = state.items.find(
        (item) => item.id === action.payload.id
      );
      const items = existing
        ? state.items.map((item) =>
            item.id === action.payload.id
              ? { ...item, quantity: item.quantity + action.payload.quantity }
              : item
          )
        : [...state.items, action.payload];
      return { items, total: items.reduce((sum, i) => sum + i.price * i.quantity, 0) };
    }
    case "REMOVE_ITEM": {
      const items = state.items.filter((item) => item.id !== action.payload);
      return { items, total: items.reduce((sum, i) => sum + i.price * i.quantity, 0) };
    }
    case "UPDATE_QUANTITY": {
      const items = state.items.map((item) =>
        item.id === action.payload.id
          ? { ...item, quantity: action.payload.quantity }
          : item
      );
      return { items, total: items.reduce((sum, i) => sum + i.price * i.quantity, 0) };
    }
    case "CLEAR_CART":
      return { items: [], total: 0 };
    default:
      return state;
  }
}
Wrap your app with this context provider and every component in the checkout flow can read and modify cart contents. For production stores handling complex inventory, consider Zustand or Jotai for more structured state management with middleware support.
Price Display and Calculations
Every cart block in the collection handles the math display:
Subtotal — Sum of all line items
Shipping estimate — Calculated or placeholder until shipping step
Tax — Calculated server-side based on shipping address
Discount/coupon — Applied inline with strikethrough on original price
Order total — Final amount the customer will pay
These calculations should run server-side for accuracy (especially tax), but the UI updates optimistically on the client to keep interactions feeling fast.
Multi-Step Form Pattern
Before diving into the shipping and payment steps, let's establish the multi-step form pattern that ties the checkout together. A progress indicator shows the buyer where they are and what comes next.
Progress Indicator
The progress indicator sits at the top of the checkout and updates as the user moves through steps:
const steps = [
  { id: 1, label: "Cart", status: "complete" },
  { id: 2, label: "Shipping", status: "current" },
  { id: 3, label: "Payment", status: "upcoming" },
  { id: 4, label: "Confirmation", status: "upcoming" },
];

function CheckoutProgress({ steps }: { steps: typeof steps }) {
  return (
    <div className="flex items-center justify-between">
      {steps.map((step, index) => (
        <div key={step.id} className="flex items-center">
          <div
            className={cn(
              "flex h-10 w-10 items-center justify-center rounded-full border-2 text-sm font-semibold",
              step.status === "complete" && "border-primary bg-primary text-primary-foreground",
              step.status === "current" && "border-primary text-primary",
              step.status === "upcoming" && "border-muted text-muted-foreground"
            )}
          >
            {step.status === "complete" ? <Check className="h-5 w-5" /> : step.id}
          </div>
          {index < steps.length - 1 && (
            <div
              className={cn(
                "mx-2 h-0.5 w-16 sm:w-24",
                step.status === "complete" ? "bg-primary" : "bg-muted"
              )}
            />
          )}
        </div>
      ))}
    </div>
  );
}
This pattern gives buyers a clear mental model of the process. They know how many steps remain, which reduces the perceived effort and lowers abandonment rates.
Step Navigation
Each step needs forward and backward navigation:
function CheckoutStep({
  onNext,
  onBack,
  isFirstStep,
  isLastStep,
}: {
  onNext: () => void;
  onBack: () => void;
  isFirstStep: boolean;
  isLastStep: boolean;
}) {
  return (
    <div className="flex justify-between pt-6">
      {!isFirstStep && (
        <Button variant="outline" onClick={onBack}>
          Back
        </Button>
      )}
      <Button onClick={onNext} className="ml-auto">
        {isLastStep ? "Place Order" : "Continue"}
      </Button>
    </div>
  );
}
The back button lets buyers review and edit previous steps without losing their progress. Store each step's data independently so navigating backward doesn't clear completed fields.
Step 2: Shipping Information
The shipping step collects the delivery address and lets the buyer choose a shipping method. This is a standard form, but the details matter for conversion.
Form Structure with react-hook-form and Zod
Use react-hook-form for performance (it minimizes re-renders) and Zod for schema-based validation:
import { useForm } from "react-hook-form";
import { zodResolver } from "@hookform/resolvers/zod";
import { z } from "zod";

const shippingSchema = z.object({
  firstName: z.string().min(1, "First name is required"),
  lastName: z.string().min(1, "Last name is required"),
  email: z.string().email("Enter a valid email address"),
  phone: z.string().min(10, "Enter a valid phone number"),
  address: z.string().min(5, "Enter your street address"),
  apartment: z.string().optional(),
  city: z.string().min(2, "City is required"),
  state: z.string().min(2, "State is required"),
  zipCode: z.string().min(5, "Enter a valid ZIP code"),
  country: z.string().min(2, "Country is required"),
  shippingMethod: z.enum(["standard", "express", "overnight"]),
});

type ShippingFormData = z.infer<typeof shippingSchema>;
This schema validates every field before the user can proceed to payment. Zod's error messages appear inline next to each field, giving immediate feedback.
Shipping Method Selection
After the address fields, present shipping options with clear pricing and delivery estimates:
Standard (5-7 business days) — Free or low cost
Express (2-3 business days) — Mid-tier pricing
Overnight (next business day) — Premium pricing
Display each option as a radio card with the method name, estimated delivery date, and price. Highlight the selected option with a border color change. Recalculate the order total when the shipping method changes.
Address Validation
For production stores, validate addresses against a real API (EasyPost, SmartyStreets, or Google Address Validation) before allowing the user to proceed. Show a confirmation modal if the API suggests a corrected address:
You entered: 123 Main St, Apt 4B, New York, NY 10001
Suggested: 123 Main Street, Apartment 4B, New York, NY 10001-1234

[ Use suggested address ]  [ Keep my address ]
This reduces failed deliveries and refund requests downstream.
Step 3: Payment
The payment step is where trust matters most. The payment form collection provides 15 blocks covering every payment layout pattern you need.
Payment Form Layouts
The payment form blocks in SERP Blocks cover:
Single-page payment — Card number, expiry, CVC, and billing address all in one form
Split billing and payment — Billing address in one section, payment details in another
Saved payment methods — Returning customers see their saved cards with an option to add a new one
Payment method tabs — Credit card, PayPal, Apple Pay, Google Pay as separate tabs
Order review sidebar — A persistent sidebar showing the order summary alongside the payment form
The most common layout places the payment form on the left (or stacked on mobile) with an order summary on the right. The summary shows line items, shipping cost, tax, and total — giving the buyer one final look before committing.
Stripe Integration
Stripe Elements provides pre-built, PCI-compliant input fields for credit card data. You never handle raw card numbers — Stripe's JavaScript captures them directly from its hosted fields.
Install the Stripe packages:
npm install @stripe/stripe-js @stripe/react-stripe-jsSet up the Stripe provider and card element:
import { Elements, CardElement, useStripe, useElements } from "@stripe/react-stripe-js";
import { loadStripe } from "@stripe/stripe-js";

const stripePromise = loadStripe(process.env.NEXT_PUBLIC_STRIPE_PUBLISHABLE_KEY!);

function PaymentForm() {
  const stripe = useStripe();
  const elements = useElements();
  const [isProcessing, setIsProcessing] = useState(false);
  const [error, setError] = useState<string | null>(null);

  const handleSubmit = async (e: React.FormEvent) => {
    e.preventDefault();
    if (!stripe || !elements) return;

    setIsProcessing(true);
    setError(null);

    const { error: stripeError, paymentIntent } = await stripe.confirmPayment({
      elements,
      confirmParams: {
        return_url: `${window.location.origin}/order-confirmation`,
      },
      redirect: "if_required",
    });

    if (stripeError) {
      setError(stripeError.message ?? "Payment failed. Please try again.");
      setIsProcessing(false);
    } else if (paymentIntent?.status === "succeeded") {
      // Redirect to confirmation
      router.push(`/order-confirmation?payment_intent=${paymentIntent.id}`);
    }
  };

  return (
    <form onSubmit={handleSubmit}>
      <CardElement
        options={{
          style: {
            base: {
              fontSize: "16px",
              color: "hsl(var(--foreground))",
              "::placeholder": { color: "hsl(var(--muted-foreground))" },
            },
          },
        }}
      />
      {error && (
        <p className="mt-2 text-sm text-destructive">{error}</p>
      )}
      <Button
        type="submit"
        disabled={!stripe || isProcessing}
        className="mt-6 w-full"
      >
        {isProcessing ? "Processing..." : `Pay $${total.toFixed(2)}`}
      </Button>
    </form>
  );
}
Wrap the checkout page with the Stripe Elements provider:
<Elements stripe={stripePromise} options={{ clientSecret }}>
  <PaymentForm />
</Elements>
The clientSecret comes from your server-side API route that creates a Stripe PaymentIntent. Never create PaymentIntents on the client.
Server-Side PaymentIntent Creation
Create an API route to generate the PaymentIntent:
// app/api/create-payment-intent/route.ts
import Stripe from "stripe";

const stripe = new Stripe(process.env.STRIPE_SECRET_KEY!);

export async function POST(request: Request) {
  const { amount, currency = "usd", metadata } = await request.json();

  const paymentIntent = await stripe.paymentIntents.create({
    amount: Math.round(amount * 100), // Stripe expects cents
    currency,
    metadata,
    automatic_payment_methods: { enabled: true },
  });

  return Response.json({ clientSecret: paymentIntent.client_secret });
}
Error Handling
Payment errors fall into categories that need different UI responses:
Card declined — Show a clear message asking the buyer to try a different card
Insufficient funds — Similar messaging, suggest an alternative payment method
Expired card — Prompt the user to check their card details
Network error — Show a retry button, don't lose the form state
3D Secure authentication — Stripe handles this automatically with a redirect
Display errors inline below the card input. Never show raw Stripe error codes to the user — map them to friendly messages. Keep the form state intact so the buyer only needs to fix the specific issue, not re-enter everything.
Trust Signals
Payment forms need visual trust cues:
A lock icon next to "Secure checkout" text
Card brand logos (Visa, Mastercard, Amex) showing accepted methods
"256-bit SSL encryption" badge
Money-back guarantee text if applicable
These signals are subtle but measurable in their impact on conversion rates.
Step 4: Order Confirmation
After payment succeeds, the buyer lands on the order confirmation page. The order confirmation collection gives you 10 blocks for post-purchase success states.
Confirmation Page Elements
A strong confirmation page includes:
Success indicator — A green checkmark with "Order Confirmed" heading
Order number — Prominently displayed for reference
Order summary — Line items, quantities, prices, total paid
Shipping details — Delivery address and estimated arrival date
Tracking information — Carrier and tracking number (if available immediately)
Next steps — What to expect (confirmation email, shipping notification)
Continue shopping CTA — Link back to the store
The confirmation page serves double duty: it reassures the buyer that their order went through, and it creates an opportunity for cross-selling. A "You might also like" section using blocks from the product list collection (20 designs) can drive repeat purchases while the buyer's wallet is already open.
Confirmation Email Trigger
Trigger a confirmation email from your server when the PaymentIntent succeeds. Use Stripe webhooks for reliability — don't rely on the client-side redirect to trigger emails, because the user might close the browser before the confirmation page loads.
// app/api/webhooks/stripe/route.ts
export async function POST(request: Request) {
  const payload = await request.text();
  const sig = request.headers.get("stripe-signature")!;

  const event = stripe.webhooks.constructEvent(
    payload,
    sig,
    process.env.STRIPE_WEBHOOK_SECRET!
  );

  if (event.type === "payment_intent.succeeded") {
    const paymentIntent = event.data.object;
    // Send confirmation email
    // Update order status in database
    // Decrement inventory
  }

  return Response.json({ received: true });
}
Validation Strategy Across Steps
Each step needs its own validation schema, but they share a pattern:
Inline validation — Show errors as the user leaves each field (onBlur)
Submit validation — Validate the entire step on "Continue" click
Cross-step validation — Verify cart contents haven't changed (price, availability) when reaching payment
react-hook-form's mode: "onBlur" provides the right balance. Validating on every keystroke feels aggressive; validating only on submit feels sluggish. onBlur validates when the user moves to the next field, catching errors at the natural transition point.
For the shipping step, debounce the ZIP code field and validate it against a real postal code database. For the payment step, Stripe Elements handles card validation internally and surfaces errors through its own onChange event.
Mobile Checkout Optimization
Over 60 percent of e-commerce traffic comes from mobile devices, and mobile checkout abandonment rates are higher than desktop. The SERP Blocks shopping cart and payment form components are responsive out of the box, but keep these patterns in mind:
Single-column layout — Stack all form fields vertically on mobile
Large touch targets — Minimum 44px height for all inputs and buttons
Appropriate input types —
type="tel"for phone,inputMode="numeric"for ZIP code and card numbersSticky CTA — Keep the "Continue" or "Pay" button fixed at the bottom of the viewport on mobile
Autofill support — Use correct
autocompleteattributes so browsers can fill shipping and payment forms automatically
Connecting the Full E-commerce Stack
The checkout flow does not exist in isolation. SERP Blocks provides components for every stage of the customer journey:
| Stage | Category | Blocks |
| Browsing | Product List | 20 |
| Categories | Shop Category | 20 |
| Product Pages | Product | 25 |
| Product Details | Product Info | 15 |
| Reviews | Reviews | 13 |
| Cart | Shopping Cart | 11 |
| Payment | Payment Form | 15 |
| Confirmation | Order Confirmation | 10 |
| Returns | Refund Status | 10 |
That is 139 blocks dedicated to e-commerce across nine categories. Combined with navbar (17 designs), footer (21 designs), and CTA (32 designs) blocks for the store shell, you have everything needed to ship a complete storefront.
All blocks are available at SERP Blocks with 60 free blocks to start and the full library of 1200+ blocks through a one-time Pro purchase. Copy the code, drop it into your Next.js project, connect your Stripe keys, and you have a checkout flow that converts.